Espresso Sour vs Bitter: The Diagnostic Guide
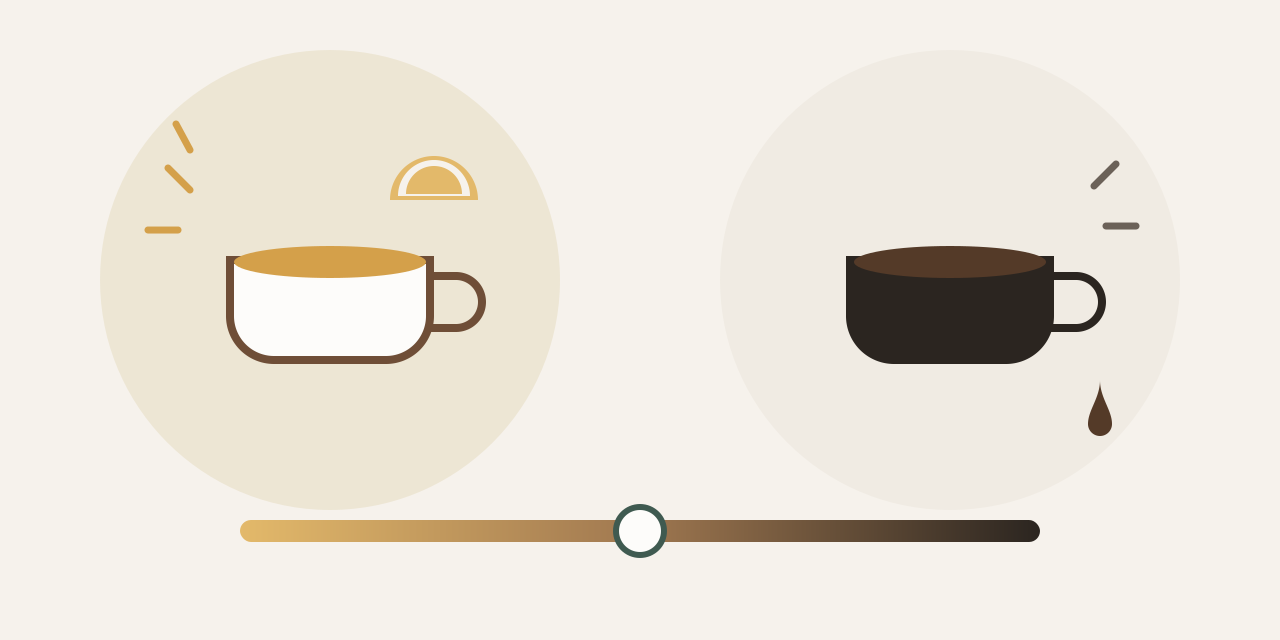
Sour means under-extracted, bitter means over-extracted, and half of all beginners mislabel which one they are tasting. Here is the diagnostic order that fixes shots without wasting a bag of beans, and the gear ladder in the order it actually pays.
Some links below are affiliate links. If you buy through them, BrewTested may earn a small commission at no extra cost to you. We only recommend gear that passes our Fit Analysis, and we publish the ones that don't.
The core rule of espresso troubleshooting fits in two lines:
- Sour, sharp, lemony, thin = under-extraction. Water did not pull enough out of the coffee. Fix direction: grind finer, extract longer, or run hotter
- Bitter, harsh, ashy, drying = over-extraction. Water pulled too much out. Fix direction: grind coarser, extract shorter, or run cooler
The catch, well documented in coffee-community threads and confirmed by pretty much every barista trainer who writes on the subject: beginners routinely call sour shots 'bitter' because both taste bad and 'bitter' is the word people reach for. Before changing anything, verify which one you actually have (a squint-and-salivate sharpness is sour; a lingering, drying harshness at the back of the tongue is bitter).
Then change one variable at a time, in this order: dose, grind, ratio, time, temperature, and only then question the beans. This guide synthesizes community consensus and published barista guidance; the diagnostic order below is the one that wastes the least coffee.

What extraction actually is
Espresso is hot water dissolving compounds out of ground coffee under pressure, and the compounds do not dissolve at the same rate. Acids and fruity aromatics come out early. Sugars and the compounds that read as sweetness and body come out in the middle. Bitter compounds and dry, ashy flavors dominate at the end.
Stop too early (under-extraction) and you get the acids without the balancing sweetness: sour, sharp, salty at the extreme, thin body, and a finish that vanishes instantly.
Go too far (over-extraction) and the bitter tail end buries everything: harsh, ashy, hollow, with a dryness that clings to your tongue like over-steeped tea.
A good shot is the middle: enough extraction to develop sweetness, stopped before the bitter fraction takes over. Every variable below (dose, grind, ratio, time, temperature) is just a lever for how far along that curve you land.
First, make sure you know which one you are tasting
This step sounds insulting and saves the most time. In community troubleshooting threads, a large share of 'my espresso is bitter' posts describe shots that poured in 15 seconds from a fast grind: textbook under-extraction, which is sour. The poster grinds coarser to fight the 'bitterness', makes the sourness worse, and concludes the machine is broken.
Two checks that separate them:
The physical check. Sourness hits the sides of the tongue fast, makes you salivate, and reads like biting a lemon or an underripe apple. Bitterness sits at the back of the tongue, builds rather than spikes, and leaves a drying, clinging finish like tonic water, dark chocolate that is too dark, or an over-steeped black tea.
The calibration trick, borrowed from barista training: taste them on purpose. A squeeze of lemon juice in water is pure sour. Tonic water or a tiny sip of unsweetened brewed coffee left on the burner too long is bitter. Thirty seconds of tasting both gives you a reference most beginners have never actually anchored.
One more wrinkle: a shot can be both sour and bitter at once. That usually means channeling: water found preferential paths through the puck, over-extracting the channels and under-extracting everything else. If your shots taste chaotic rather than cleanly sour or cleanly bitter, fix distribution and puck prep before touching the grinder dial.
The diagnostic order: change one thing at a time
Work top to bottom. Each step assumes the ones above it are locked in and unchanged.
1. Dose, by scale. Weigh the dry coffee going into the basket, every time, to 0.1g if your scale allows. An inconsistent dose makes every other variable unreadable. Use the dose your basket is designed for (commonly 18g for an 18g basket) and hold it constant. If you fix nothing else today, fix this.
2. Grind size: the main lever. Finer grind slows the shot and increases extraction (fights sour). Coarser speeds it up and decreases extraction (fights bitter). Move one small step at a time and change nothing else. Grind adjustments on a fresh setting also need a shot or two to settle, since most grinders retain a little coffee from the previous setting.
3. Ratio. The ratio of dry dose to liquid espresso out. Longer ratios (more water through the same coffee) increase extraction and dilute intensity; shorter ratios do the opposite. Hold your ratio constant while dialing grind, then adjust it for taste once shots are balanced.
4. Time: a readout, not a target. Shot time is mostly a consequence of grind and dose, not an independent dial. Use it as a diagnostic: a shot that hits your ratio in 12 seconds is telling you the grind is too coarse; one that takes 45 is telling you it is too fine (or the puck is channeling). Chasing a stopwatch number by fiddling everything at once is the classic dialing-in death spiral.
5. Temperature, if you can control it. Hotter water extracts faster (fights sour), cooler extracts slower (fights bitter). Light roasts generally want the hot end of the brew range, dark roasts the cool end. On machines without temperature control (a stock Gaggia Classic Pro, for instance) this lever barely exists, which is exactly why PID kits are the community's favorite upgrade: our Gaggia Classic Pro mods guide covers that in depth.
6. Only now, the beans. If a shot refuses to come into balance no matter what you do upstream, the coffee itself is the remaining suspect. That is the next section.
The gear ladder: what to buy, in the order it pays
Everything above is free. Once technique is locked and shots are still wrong, the question becomes which piece of hardware to buy, and the community answer is remarkably consistent: the order matters more than the budget. Buying the right $25 item before the right $400 one is the difference between fixing your espresso and owning nicer equipment that makes the same bad shot.
The ladder below is ordered by payback per dollar, not by price. Work down it, and stop at the first rung that fixes your cup.
Rung 1: a 0.1g scale with a timer. The cheapest genuinely necessary item in espresso. Without a repeatable dose, every change you make downstream is unreadable, because you cannot tell whether the shot changed or the dose did. If you are eyeballing the basket or trusting a grinder's timed dose, buy this before anything else and the next four rungs get easier to judge. A slim scale that fits under the portafilter matters on machines with a shallow drip tray.
Rung 2: a WDT tool. Grinders clump, and clumps make water take the easy path around them. That is channeling, which is what produces a shot that tastes sour and bitter at once. A WDT tool is a handle with fine needles that you stir through the dry grounds for a few seconds before tamping. It costs less than a bag of good beans and is the single most reliable fix for erratic shots on any home grinder. This is the rung most people skip and most people need.
Rung 3: a bottomless portafilter, if you are still guessing. This one does not improve the shot at all. It shows you the shot: with the bottom of the basket open, channeling is visible as a spray or a jet the moment it happens, instead of being something you infer from taste. If you have worked the diagnostic order and still cannot tell whether your problem is puck prep or extraction, a bottomless portafilter answers that question in one shot. Buy it as a diagnostic instrument, not as an upgrade.
Rung 4: a precision basket. Stock baskets, especially the ones bundled with entry machines, vary in hole size and pattern. A precision basket has consistently sized, evenly distributed holes, which makes flow more even across the puck. Two conditions before you buy one: your basket has to match your dose (an 18g basket wants roughly 18g of coffee, and dosing 14g into it is its own problem), and puck prep has to already be under control. A precision basket does not rescue bad distribution.
Rung 5: a puck screen. A thin metal disc that sits on top of the puck. It spreads the incoming water, keeps the shower screen cleaner, and modestly helps with even saturation. Real, small, and the last cheap rung. Anyone who tells you a puck screen transformed their espresso had a distribution problem it was masking.
Rung 6: the grinder. Everything above is under $100 combined. This is where the money is, and it is genuinely where the ceiling is too: an entry burr grinder cannot produce a consistent enough particle distribution for a machine to extract evenly, and no accessory fixes that. If you have climbed rungs 1 to 5 and shots are still inconsistent from one to the next, the grinder is the answer and it is worth what it costs. Our espresso grinder guide and the under-$200 tier cover that decision, and how to split your espresso budget makes the case for why the grinder outranks the machine.
What each upgrade actually fixes
| Upgrade | Cost tier | What it genuinely fixes | What it does not fix |
|---|---|---|---|
| 0.1g scale with timer | $ | Dose consistency, which makes every other variable readable | Nothing about the shot itself. It makes your changes measurable, not better |
| WDT tool | $ | Clumping and channeling, the cause of shots that taste sour and bitter at once | A grinder that produces genuinely inconsistent particle sizes |
| Bottomless portafilter | $$ | Nothing. It shows you channeling instead of leaving you to guess | Anything at all, on its own. It is a diagnostic tool |
| Precision basket | $$ | Uneven flow from inconsistent stock basket perforation | Bad distribution, or a dose that does not match the basket size |
| Puck screen | $ | Water dispersion at the top of the puck, plus a cleaner shower screen | Channeling. It is a small gain sold as a large one |
| Better grinder | $$$ | Shot-to-shot consistency, and the ceiling on how good any shot can be | Puck prep. A great grinder still clumps and still needs a WDT stir |
If a shot tastes sour and bitter in the same sip, do not touch the grind dial. That is channeling, and the fix is distribution: stir the grounds, level them, tamp straight. Grinding coarser or finer just moves an uneven extraction to a different place.
If you own a Breville or Sage machine (the 54mm question)
Most accessory advice online assumes a 58mm portafilter, which is the commercial standard and what E61 machines use. Breville's popular home machines, including the Bambino, Bambino Plus and Barista Express, use a 54mm basket instead, and a 58mm accessory simply will not fit.
If you own one of those, buy 54mm parts specifically. The economical route is a combined kit rather than five separate purchases: a 54mm accessory set typically bundles the dosing funnel, WDT tool, puck screen, leveler and a calibrated tamper for roughly what two of those cost individually, and a bottomless portafilter set adds the diagnostic piece. A WDT and funnel set is the cheapest way onto rung 2 if you want to start there and nothing else.
One caveat on the entry Breville machines specifically: the stock double basket is a pressurised (dual-wall) basket, which fakes crema by forcing the shot through a single small hole. It is very forgiving and it makes dialing in impossible, because the grind barely affects the flow. If your shots taste the same no matter what you change, check which basket you are using before you buy anything on this page. Machine-side faults, including a puck that will not release cleanly, are covered separately in our Barista Express problems guide.
The fix ladder, as a shopping list
Amazon links, correctly tagged. Prices move, so check current pricing at each link. Nothing here has been bench-tested by us: these are the categories the espresso community consistently converges on, chosen on published specs and owner reports. Buy down the list and stop when your shots come right. Check your portafilter size (54mm on most Breville home machines, 58mm on nearly everything else) before ordering baskets, screens or portafilters.
Rung 1, buy this firstTIMEMORE Basic 2.0 coffee scale
0.1g resolution with a built-in timer, from a brand the community has trusted for years. If your drip tray is shallow, a slimmer scale may fit better under the portafilter.
Check price on Amazon Rung 2, best value on this page
WDT distribution tool, 0.4mm needles
Fine needles on a stand for breaking up clumps before you tamp. The most reliable cheap fix for channeling. An adjustable-width version covers 51, 54 and 58mm baskets if you have more than one machine.
Check price on Amazon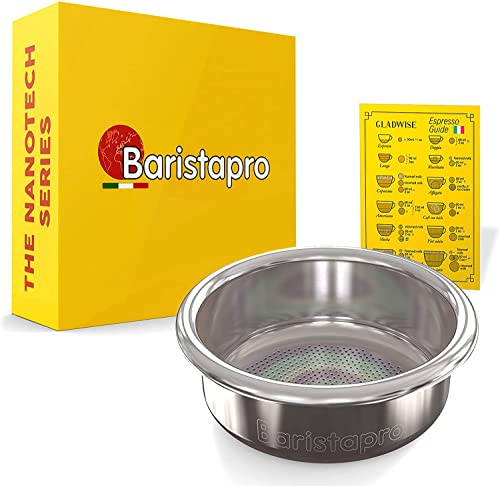 Rung 4, 58mm machines
IMS Baristapro precision basket, 58mm 18g
Consistent hole size and spacing for even flow across the puck. Match the basket to your dose, and fix distribution first or you will not see the benefit. Also available as a competition ridgeless 18/22g.
Check price on Amazon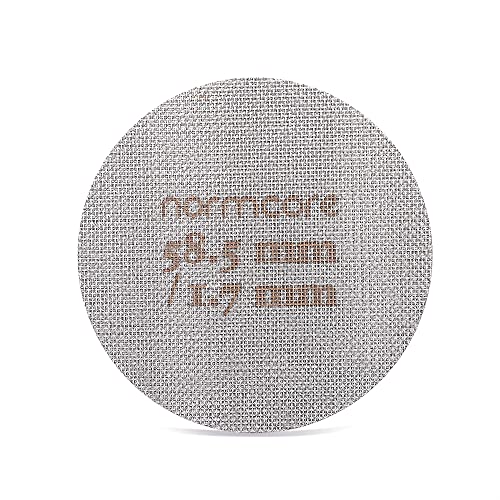 Rung 5, small but real
Normcore 58.5mm puck screen
Sits on top of the puck to spread incoming water and keep the shower screen clean. A genuine small improvement, not the transformation the marketing implies.
Check price on Amazon Rungs 2, 4 and 5 in one box
KNODOS 54mm accessory set (Breville/Sage)
Dosing funnel, WDT tool, puck screen, leveler and tamper sized for Bambino, Bambino Plus and Barista Express. The efficient way to climb the ladder if you own a 54mm machine.
Check price on Amazon Rung 3, the diagnostic
54mm bottomless portafilter set
Shows channeling as it happens instead of leaving you to taste your way to it. Buy it when you cannot tell whether the problem is puck prep or extraction.
Check price on AmazonTaste symptom to first fix
| What you taste | What it means | Change first | If that is not enough |
|---|---|---|---|
| Sour, sharp, lemony, thin body, vanishing finish | Under-extraction | Grind finer, one step | Raise temperature (light roasts often need it), check dose is not too high for the basket |
| Bitter, ashy, harsh, drying finish that lingers | Over-extraction | Grind coarser, one step | Lower temperature, shorten the ratio slightly |
| Sour AND bitter in the same shot, spritzy or uneven flow | Channeling: uneven extraction | Fix puck prep: distribute, level, tamp straight | Check basket and shower screen cleanliness, dose matched to basket |
| Salty, aggressively sour, almost savory | Severe under-extraction | Grind significantly finer | Confirm the shot is not running under 15 seconds; verify basket type |
| Flat, dull, papery, no aroma | Stale beans, not extraction | Fresher coffee with a roast date | Check beans are within roughly 2-8 weeks of roast and stored sealed |
| Burnt, rubbery, harsh regardless of settings | Roast character or robusta content | Try a different (lighter, arabica) coffee | Lower temperature to soften it in the meantime |
The bean layer: freshness, roast, and species
At the margin, fresh beans matter more than gear. A $2,000 machine cannot extract flavors that have already gassed off, and community troubleshooting threads are full of dialing-in misery that ended when the poster replaced supermarket beans of unknown age with a bag carrying a roast date.
Freshness. Look for a printed roast date, not a best-by date. The commonly cited sweet spot for espresso is roughly 1-8 weeks past roast: very fresh beans (under about a week) gush CO2 and pull unevenly, and months-old beans go flat and papery. No roast date printed usually means the answer is 'too old'.
Roast level changes the rules. Dark roasts are more soluble and extract fast, so they tip into bitterness easily: they generally want coarser grinds, cooler water, and shorter ratios. Light roasts are dense and stubborn, sour by default until pushed: finer grinds, hotter water, longer ratios. If you switched roast levels and your recipe fell apart, that is expected behavior, not a broken machine.
Arabica and robusta. Robusta carries roughly twice the caffeine and a harsher, more bitter, rubbery flavor profile than arabica. Many traditional Italian-style espresso blends include robusta deliberately (for crema and punch), so if a blend tastes assertively bitter no matter how you dial it, check the bag: some of that bitterness may be the recipe, not your technique.
If the machine side is the problem instead, especially weak pressure or erratic shots on popular entry machines, our Barista Express problems guide covers the hardware-side diagnosis, and how we test explains what our recommendations are based on.
About the classic recipe: 1:2 in 25-30 seconds
The standard advice, repeated everywhere, is a 1:2 ratio (for example 18g of coffee in, 36g of espresso out) in roughly 25-30 seconds. It is genuinely useful, and it is worth being honest about what it is: a starting point with good odds, not a law of physics.
It exists because it lands medium and medium-dark roasts (most of what people buy) in a drinkable zone often enough to give beginners a foothold. But plenty of excellent shots live outside it: light roasts often shine at 1:2.5 or longer, traditional dark-roast ristrettos run shorter, and a delicious 22-second shot needs no apology. The community has increasingly moved toward 'taste is the target, numbers are the map', and we think that is right.
Use 1:2 in 25-30 seconds to get your first drinkable shot. After that, let the sour/bitter framework above, not the stopwatch, tell you which direction to move.
Sour vs bitter espresso: FAQ
Does sour espresso mean under or over extracted?
Sour means under-extracted: the water did not dissolve enough of the coffee, so you taste the fast-dissolving acids without the sweetness that balances them. Bitter is the opposite, over-extraction. The fix directions are mirrored: grind finer, longer, or hotter for sour; coarser, shorter, or cooler for bitter.
How do I fix sour espresso?
Grind finer, one small step at a time, holding dose and ratio constant. If it is still sour with a reasonable shot time, raise brew temperature if your machine allows it, and check the beans: light roasts are sour-prone by nature and need finer grinds and hotter water than the same recipe on a medium roast.
Why does my espresso taste bitter even after cleaning?
If the machine is clean, bitterness is usually over-extraction: grind too fine, water too hot, or ratio too long. Go one step coarser first. Also check the coffee itself: very dark roasts and robusta-heavy blends taste bitter by design, and no dial-in fully removes it.
Does grind size affect sour or bitter taste?
It is the single biggest lever. Finer grinds increase extraction, pushing a shot away from sour and toward bitter; coarser grinds do the reverse. That is why the standing advice is to adjust grind one step at a time with everything else held constant, so you can actually see the effect.
Can old coffee beans make espresso taste sour?
Stale beans more often taste flat, papery, and dull rather than sharply sour, but they extract poorly and unpredictably, which can read as sour or just lifeless. Fresh beans with a printed roast date, used within roughly 1-8 weeks of roast, remove the biggest wildcard in dialing in. At the margin, fresher coffee improves shots more than better hardware does.
What is the difference between sour and bitter espresso?
They are opposite ends of the same scale. Sour is under-extraction: the water dissolved too little, leaving sharp acids without balancing sweetness, and it hits the sides of the tongue fast. Bitter is over-extraction: the water dissolved too much, pulling the harsh tail-end compounds, and it builds at the back of the tongue with a drying finish. Because both simply taste bad, beginners frequently call a sour shot bitter and then adjust in the wrong direction.
My espresso is sour and bitter at the same time. What is wrong?
Almost always channeling: water found preferential paths through the puck, over-extracting where it ran and under-extracting everywhere else, so you taste both faults in one cup. Do not change the grind. Fix distribution first, with a WDT stir, a level bed and a straight tamp. A bottomless portafilter will show you the channeling directly if you want to confirm it.
What should I buy first to fix bad espresso?
A 0.1g scale with a timer, then a WDT tool. Together they cost less than a decent bag of beans and they address the two things that make home espresso unreadable: an inconsistent dose and clumped grounds. Only after those, and after working through grind, ratio and temperature, is a grinder upgrade the right purchase, and it is the expensive one.
Do puck screens and precision baskets actually make a difference?
Modestly, and only once puck prep is already good. A precision basket evens out flow that a poorly perforated stock basket disturbs; a puck screen improves water dispersion at the top of the puck and keeps the shower screen cleaner. Neither fixes channeling, and neither compensates for a grinder that cannot produce a consistent grind. Buy them after a scale and a WDT tool, not before.
Related reading
If the fix ladder pushed you to rung 6, how to split your espresso budget is the allocation argument for spending it on the grinder, and grinder first or machine first covers the same question for a first setup. The grinder picks themselves are in best espresso grinder under $500 and the under-$200 tier.
For machine-side faults rather than extraction faults, see Barista Express problems and steam wand not working. If shots got worse gradually rather than suddenly, how often to descale is worth checking. And how we test explains what our recommendations are based on.